Everything Hey Eduardo can do
Eduardo lives in your menu bar and does nothing until you ask. Highlight something, press a shortcut, and a panel appears over your work — it never takes you out of the app you were reading. Everything below runs on your own Mac unless you deliberately turn on cloud mode.
The shortcuts
All of these are in the menu bar too, next to what they do — there is nothing to memorise.
Summarise something long
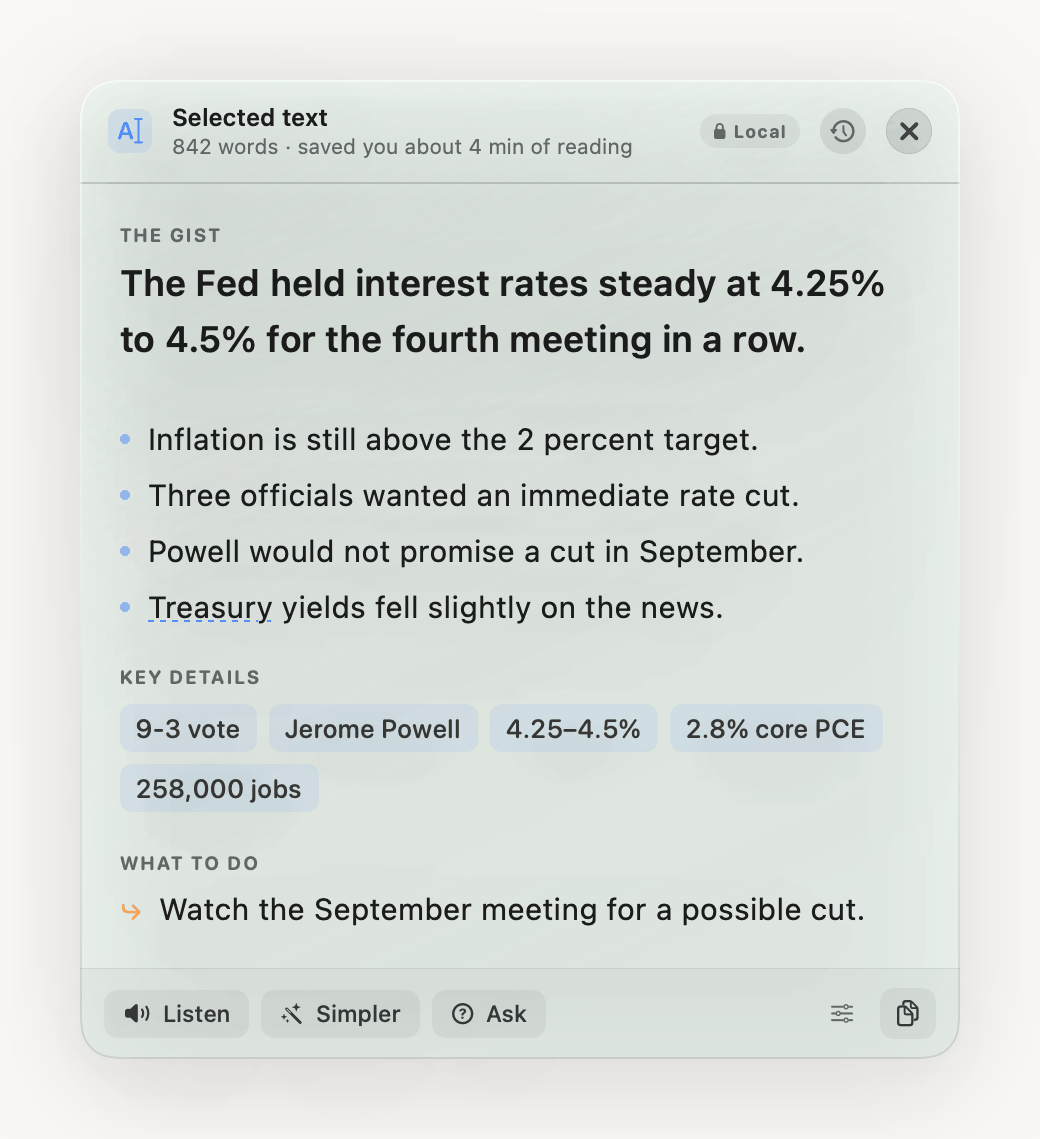
Highlight a block of text and press ⌥ ⇧ S. You get the single most important thing in one sentence, then a few short points under it. Figures, dates and names are pulled out separately, because those are the easiest things to misread and the most expensive to get wrong.
Specialist words get a dotted underline. Click one and Eduardo explains it in a sentence, without leaving the panel.
Explain it in plain words
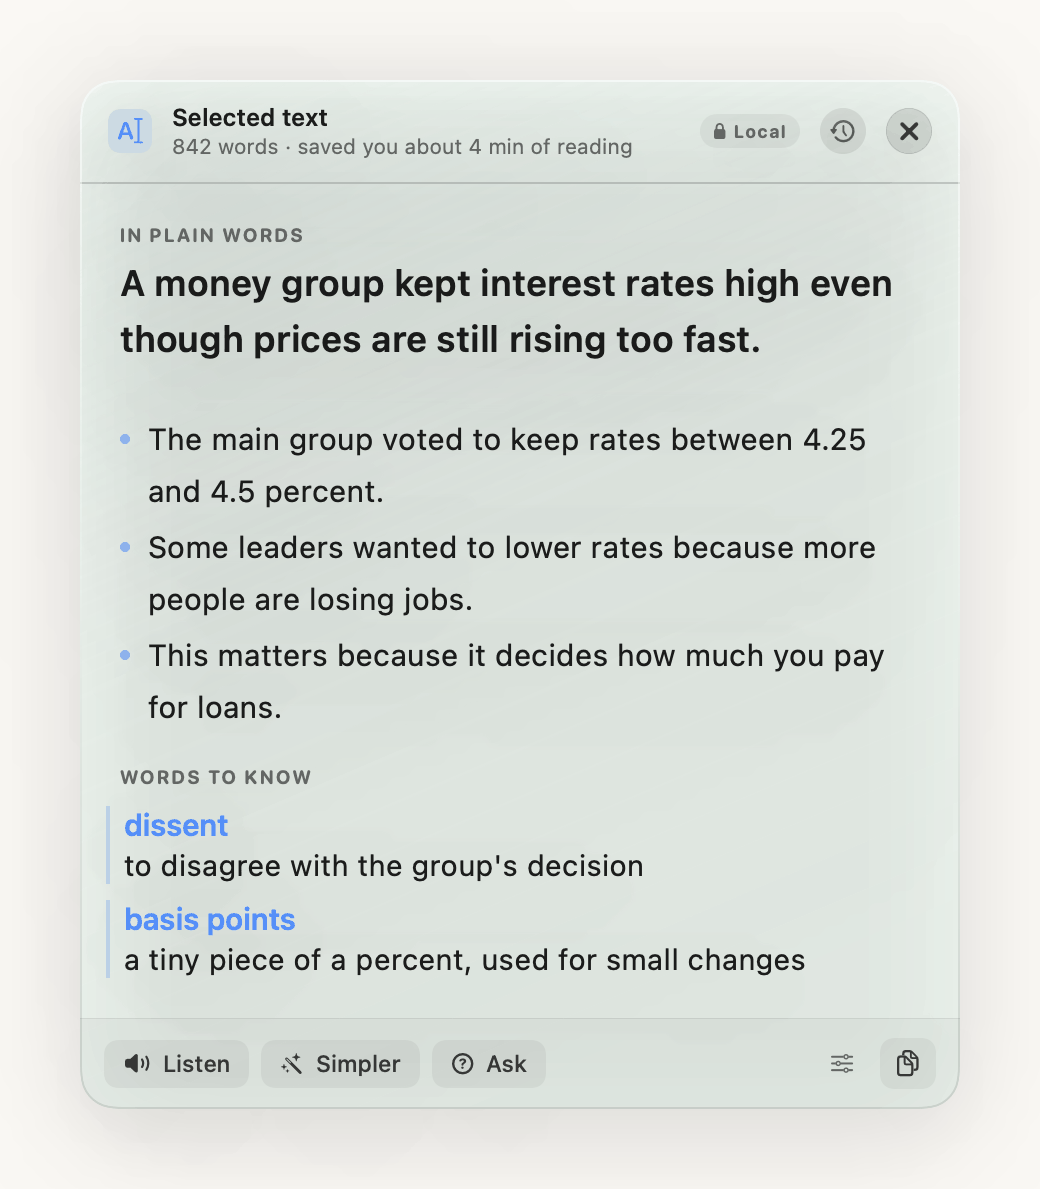
⌥ ⇧ E is the one to reach for when the writing itself is the problem. It does not shorten the text — it rewrites it in words a ten-year-old would know, says why it matters, and lists every hard word with a plain meaning underneath.
It also works when there is nothing to highlight. Press it with no selection and Eduardo drags a box over the screen and explains what it reads there instead — useful on a PDF that will not let you select anything.
“What should I watch out for?”
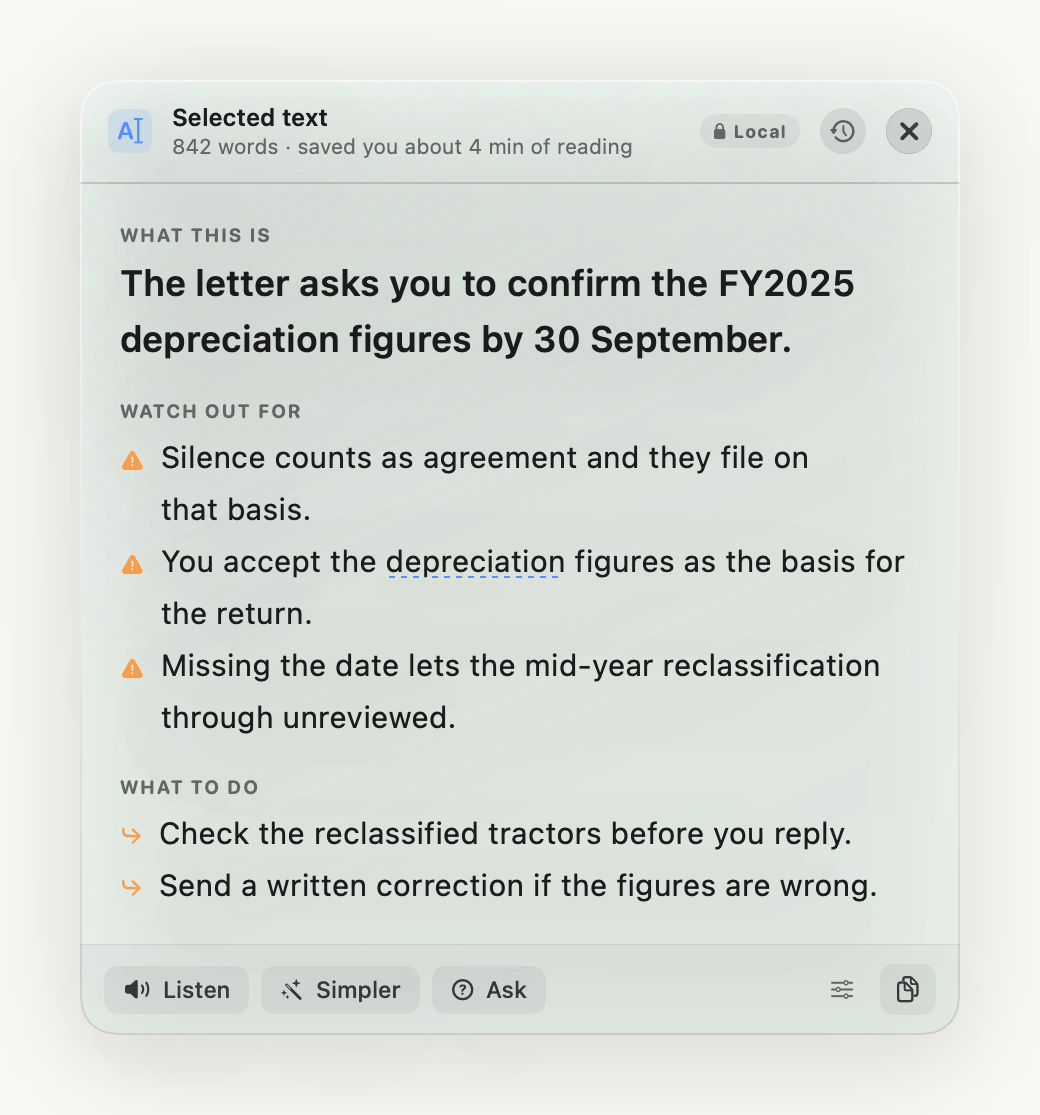
A preset, not a question you have to type. Eduardo reads the text for what it commits you to, what it takes your agreement on, and what expires — then says what to do about it.
It reports only what the text itself says. It will not invent an obligation that is not there, and it does not offer legal, tax or financial advice — it points at the line that creates the exposure and stops.
“How do I respond to this?”
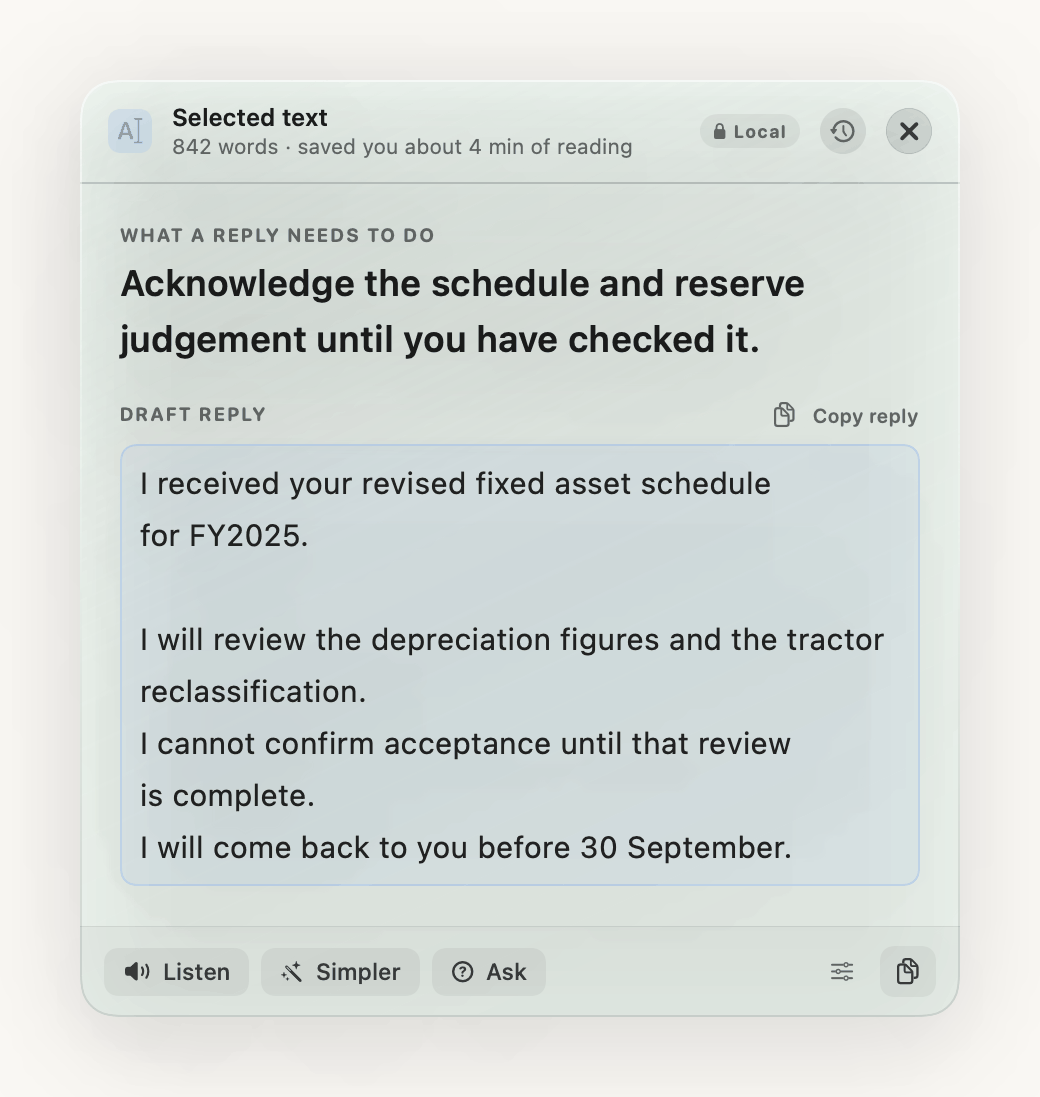
Drafts a reply you can edit and send, with a Copy button next to it. Short, plain and professional — no flattery, no throat-clearing.
It will not agree to anything on your behalf. The draft never calls a figure correct or accepts a deadline, because you have not checked them yet — it acknowledges the request and says you will review. If the reply needs a fact the text does not give, it writes [...] for you to fill in rather than inventing one.
Just ask — and keep asking
If you already know your question, skip the summary. ⌥ ⇧ A loads what you highlighted and opens straight to a question box. Type it, or hold the microphone and say it.
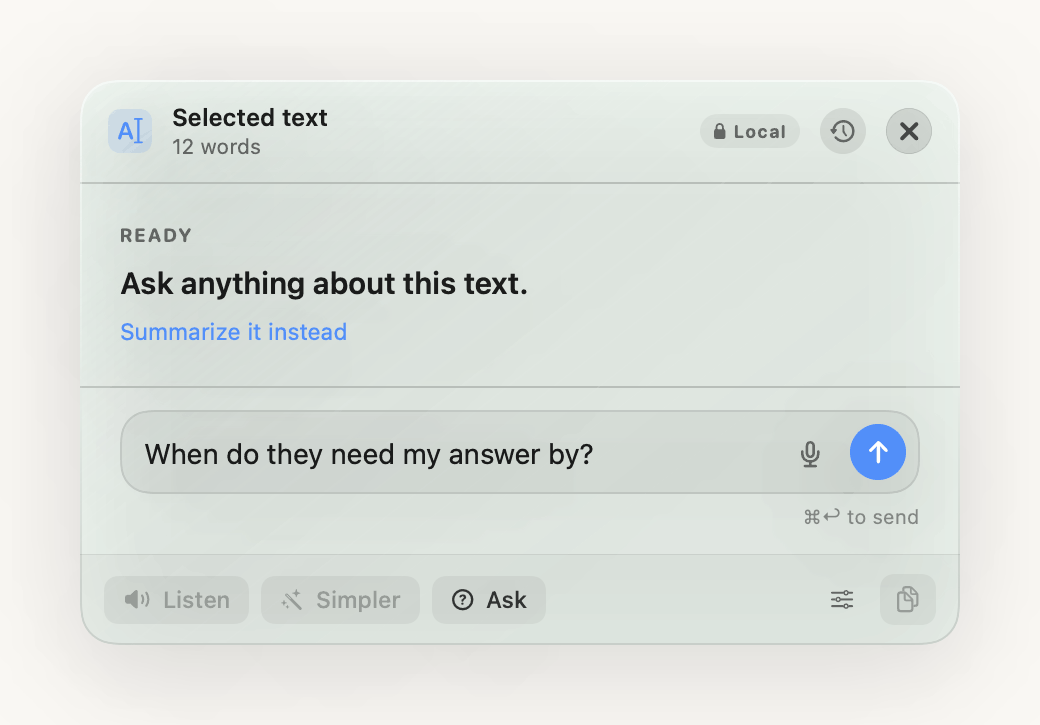
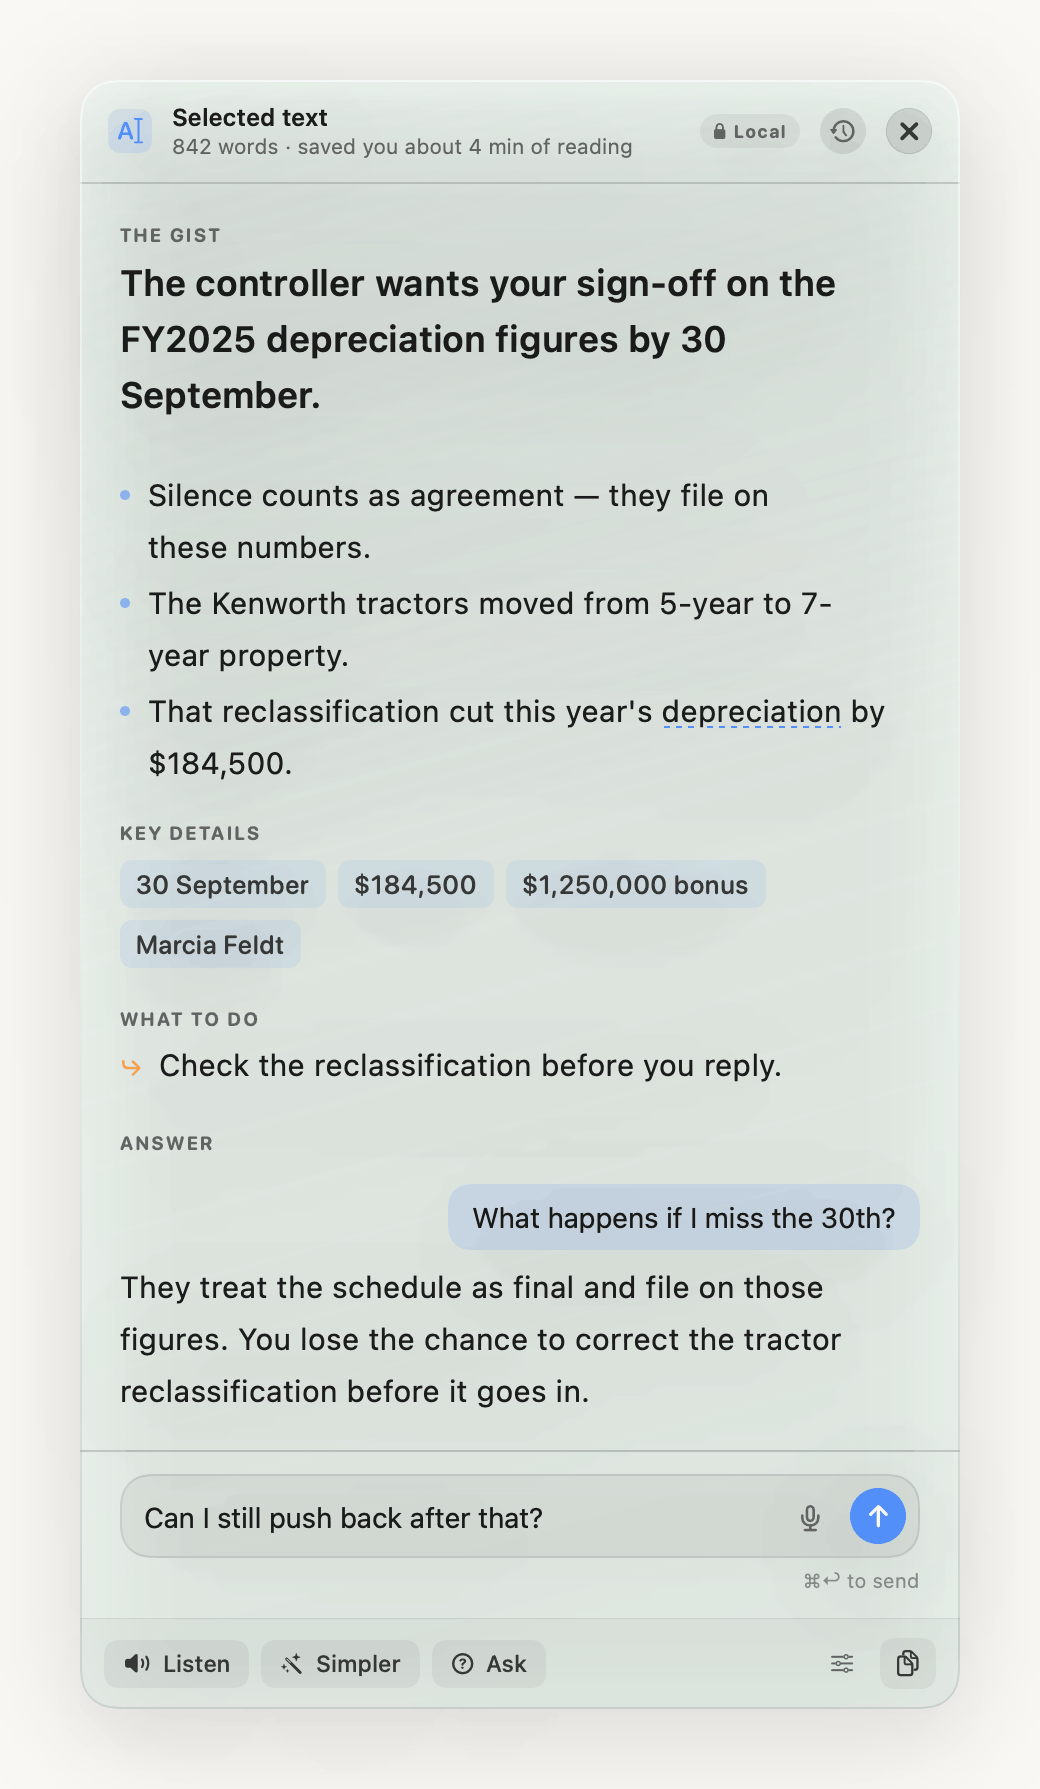
Follow-ups remember what came before. Ask “what happens if I miss it?” and Eduardo knows what it was, without you re-explaining. The thread belongs to that one piece of text and clears the moment you capture something else — so one client's questions never bleed into another's.
Ask a PDF directly
Pick Ask About a Document… from the menu bar and choose a PDF or a text file. Eduardo pulls the text out and opens straight to a question — no copying, no pasting.
A scanned PDF is a picture of a page, so there is no text in it to pull. Eduardo says so and points you at ⌥ ⇧ C, which reads it off the screen instead.
A question only ever reads a window of a long document. On the local model that is a few thousand words, so Eduardo tells you when a document is longer than it can take in — rather than answering confidently about pages it never read.
Read anything off the screen
⌥ ⇧ C freezes the screen and lets you drag a box. Whatever is inside it gets read with Apple's built-in text recognition, on your Mac, and handed to Eduardo like any other capture.
This is the answer to anything you cannot select: a scanned notice, a locked PDF, a screenshot someone sent you, a table inside an image. Only the text is used — the picture itself never goes anywhere.
Speak instead of typing
Hold the microphone in the Ask box and talk. Let go and your words appear in the field — Eduardo fills it in rather than sending, so a misheard question costs you an edit instead of an answer to the wrong thing.
Speech is turned into text by a model on your Mac. The recording is deleted as soon as it has been read, and it is never uploaded — in local or cloud mode. Download the speech model once from Settings → Speech.
Eduardo can talk back, too. Listen reads the answer aloud in a bundled voice that sounds the same on every Mac, or any macOS system voice you prefer.
Everything you looked at recently
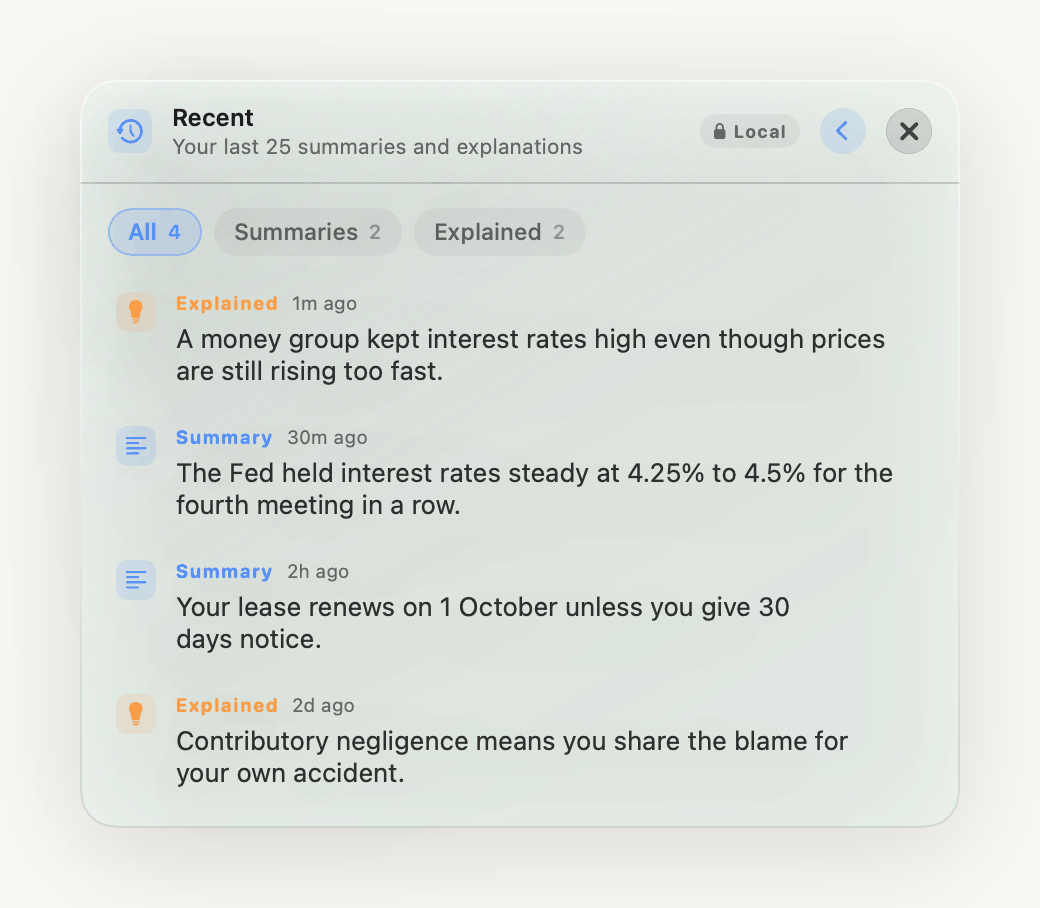
The clock button in the panel — or Recent… in the menu bar — lists your last 25 results, each badged with what it was. Opening one restores it instantly without running the model again, and Listen, Ask and the style menu all still work on it.
It is stored on your Mac only. Turn it off or clear it in Settings → Reading → Recent.
Local and cloud
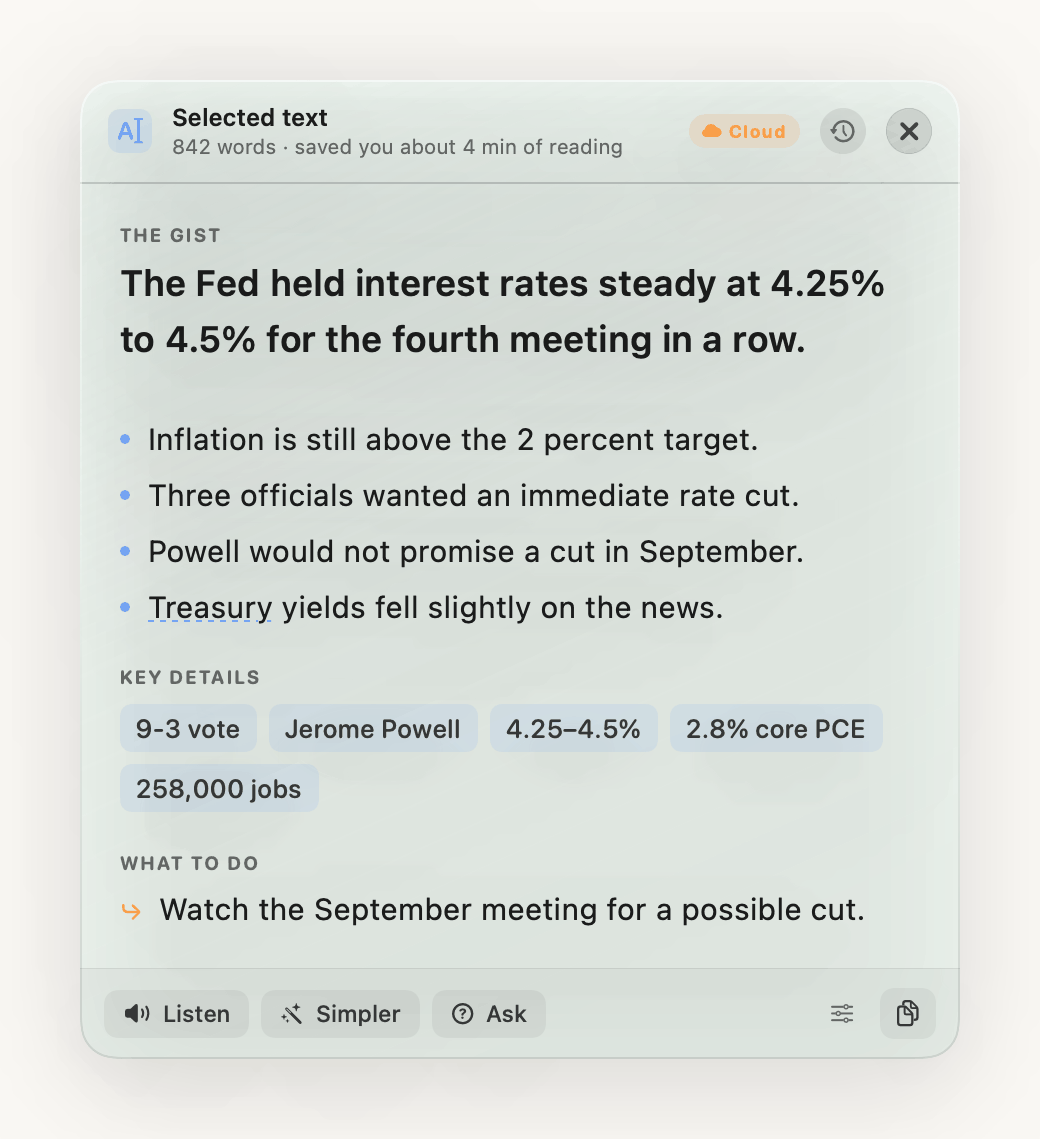
Local is the default and the reason this app exists. The model runs on your Mac, and nothing you capture is transmitted anywhere.
Cloud mode is opt-in and uses your API key with Anthropic, OpenAI or OpenRouter — billed to you, never routed through us. It is there for general research where a current, much larger model helps and no client data is involved.
The panel shows which mode is active at all times, in every state. Local is the quiet grey one; cloud is deliberately hard to miss. Switching to cloud asks you once, and names what changes.
Make it easier to read
Settings → Reading has three panel styles with a live preview, six background tints, and controls for font, size, line spacing and letter spacing. There is a bionic-style bold on word beginnings if that helps you.
Which of these actually help is individual, so none of them are on by default. If translucency distracts you, the Solid style is one click away.
Simpler in the panel footer rewrites the answer you are looking at in plainer language, at a lower reading level, without running the whole thing again.
What it costs your Mac
At rest Eduardo uses around 44 MB and no CPU. The language model loads on your first summary and is released again after five idle minutes, so it is not parked in memory all day — you can change that, or free it immediately, from the menu bar.
Reading aloud and speech recognition each run in a short-lived helper process that exits the moment it is done, so the memory they need is handed straight back instead of being held for the rest of the session.
Still stuck?
Email . If something is not working, the app can print a full diagnostic — run /Applications/HeyEduardo.app/Contents/MacOS/HeyEduardo --selftest in Terminal and send us what it says.